Envelope Liners
1. Make a template: Cut off the sticky part of the envelope flap. Trace the rest of the envelope on lightweight cardboard. After you cut out the template (I used my Fliskars rotary cutter) trim the square part about 1/8" so that the liners will slide into the envelope easily. I spent a bit of time trimming up my template until it was just the way I wanted it.
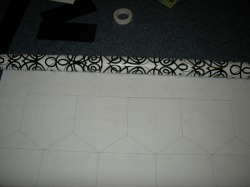
2. Trace and cut out the liners: On the back side of the wrapping paper trace the template. In the end, I ended up drawing all the lines by measurement. It helps a lot if you buy wrapping paper with grid lines on the back! Next, using an craft knife, cut along the lines. I placed a ruler against the lines, and used the ruler to guide my knife! I just put an old Five-Star notebook under the paper while cutting. (The Five-Star notebooks generally have the hard cover) I have to admit, the cutting part was a lot of fun!
Here's a crude pic of the pre-cut paper:
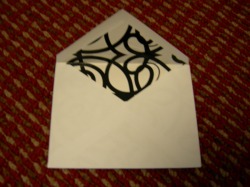
3. Inserting liners: This part can be a little tricky. I had to try different methods, but eventually the method I stuck with was to put a strip of two sided scrapbooking take on each edge of the flap. Then, use a glue stick to put glue down the center of the liner. I found that it is much easier to insert the liners if there is no adhesive in the corners. Next, slide the liner in and remove the tape backing. Carefully fold the flap to crease the liner. I put them under heavy books for a few days to secure the adhesive and creases.
Here's the finished product:
Here's the finished product:
Cake Topper
I ordered the cake topper from Crafty Eddy for $14 including shipping. His work is excellent and he has a very fast turnaround time. His email is: [email protected].
The rhinestones are from an ebay store: http://stores.ebay.com/RHINESTONES-AND-CRAFTS
They were $6.99 for 5 gross of 10ss peridot rhinestones. I used 5 gross plus about 20 more. I ordered hotfix rhinestones then glued them on the topper using E600 glue found at craft stores and the craft section of Wal-Mart.
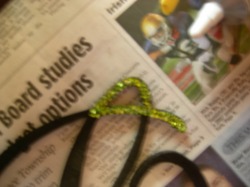
I first painted the letter with black metallic paint. To glue the rhinestones, I applied a small section of glue at a time. I used a little tool that I found at Michael's to pick up and place the rhinestones. The tool is a plastic stick with a round rubber tip and it was in the jewelry section.
Here's a pic of the letter in process!
The rhinestones are from an ebay store: http://stores.ebay.com/RHINESTONES-AND-CRAFTS
They were $6.99 for 5 gross of 10ss peridot rhinestones. I used 5 gross plus about 20 more. I ordered hotfix rhinestones then glued them on the topper using E600 glue found at craft stores and the craft section of Wal-Mart.
I first painted the letter with black metallic paint. To glue the rhinestones, I applied a small section of glue at a time. I used a little tool that I found at Michael's to pick up and place the rhinestones. The tool is a plastic stick with a round rubber tip and it was in the jewelry section.
Here's a pic of the letter in process!
